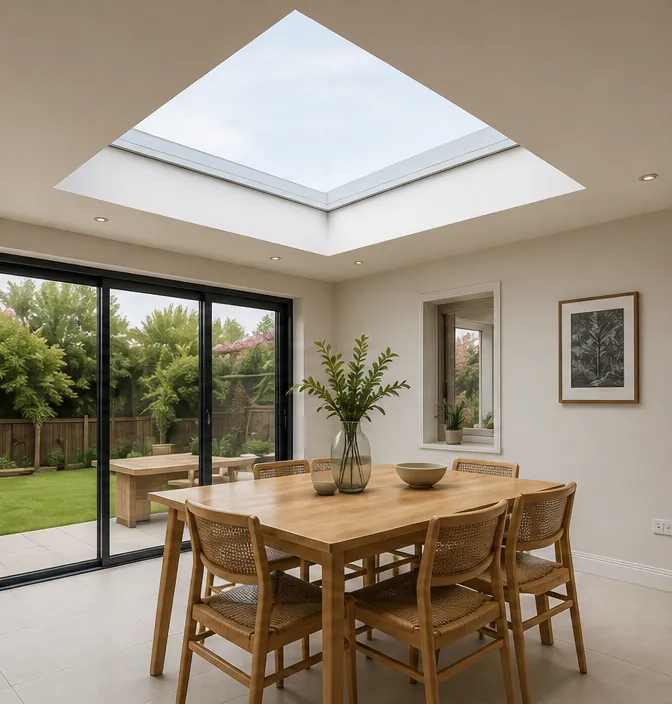
The carpenter has framed the flat roof of the new kitchen, the joists are in, and someone asks what height the rooflight kerb should be. It is a fair question and it is asked at an awkward moment, because the answer touches the joists, the insulation depth, the roofer's membrane and the plasterer's reveal all at once. Get the number wrong and the roofer is working around a kerb that is too low, or the glass sits higher than the room below was designed for.
The upstand is the least glamorous part of a flat rooflight and the one that decides how well the rest of it performs. This guide explains what it does, how high it should stand, the two ways it is usually built, why the fall of the roof matters, and how to insulate it. At the end there is a short list of what to agree with your builder, in writing, so the opening is the right size on the day the roof is covered.
What the upstand does
A flat rooflight does not sit directly on the roof surface. It sits on an upstand, a short raised wall around the opening that is also called a kerb. Builders use both words, and in this guide they mean the same thing: the frame, usually timber, that rises from the roof deck and carries the rooflight above it.
The upstand does three jobs. First, it lifts the glass clear of the water that runs across a flat roof, so rain and standing water meet the roof covering rather than the joint between glass and frame. Second, it gives the roofer something to dress the waterproof layer up against. A membrane that turns up a vertical face and is finished beneath the rooflight's own trim is far more dependable than one that has to be cut around a hole in a flat surface. Third, it is the fixing: the rooflight is attached to the kerb, so the kerb has to be square, level and strong enough to carry the unit.
The upstand belongs to the roof build, not to the glass that arrives later. The opening is framed with the roof, the kerb is made with the roof, and the covering is laid up the kerb with the roof. The rooflight itself is the last piece to arrive. That order is the reason kerb sizes need to reach the builder early: the kerb is built long before the glass is.
Height above the finished roof
The usual starting guidance is that the kerb should rise 150mm or more over the completed roof covering, and the maker's instructions for the specific model have the final word. The figure is taken from the top of the finished covering, not from the deck. This catches people out, because a kerb that looks tall when only the plywood is down can finish well short of the right height once insulation, a fall layer and the membrane are on top.
Most of the arguments about height come from the fact that two surfaces are in play. The deck is the structural surface the roofer starts from. The finished covering is where the water runs, and it is the one that sets the upstand height. Between the two sit the insulation, any tapered boards that create the fall, and the covering itself. Whoever specifies the kerb needs to know the build-up before anyone picks a number.
A taller kerb is not automatically better. Extra height lifts the glass, raises the visible edge on the outside and deepens the reveal inside. On a terrace extension with a parapet, a higher kerb can stand proud of the wall line and change the elevation the council approved. On the other hand, a kerb that is too shallow leaves the roofer little to dress the membrane against and makes the detail harder to do well.
- The deck surface: where the roofer starts, and the datum the carpenter works to.
- The insulation and fall layer: the thickness above the deck, which can differ from one side of the opening to another.
- The covering: the thickness of the membrane or sheet that goes on last.
- The maker's minimum: the upstand height stated in the instructions for the exact rooflight, which overrides any rule of thumb.
If the unit has a rooflight with a slim visible edge, the kerb may be hidden by the overhang of the glass, and the height you see from the garden is quite different from the height the roofer worked to. Frameless designs are covered in our guide to frameless flat rooflights. Whatever the style, the quote names the unit and the upstand it needs, so the number comes from the product and not from a guess.
Timber kerbs and factory kerbs
There are two ways to get a kerb. The first is a site-built timber upstand, where the carpenter forms the opening from structural timber and cladding board, usually a treated softwood frame with a plywood skin. The second is a factory-made kerb supplied with the rooflight, made from a material that does not rot, usually a moulded or fabricated insulated section built to fit the unit.
A timber kerb is the more common choice on a new extension. It is part of the carpentry package, it adjusts to the roof build-up on site, and any competent carpenter can form one. Its weak points are accuracy and moisture. The opening has to be square and the top edge level in both directions, or the rooflight rocks or sits with a gap. The timber must be dry, treated where the maker asks for it, and protected until the roofer covers it.
A factory kerb takes the guesswork out of it. It arrives to the rooflight's dimensions, the top face is flat and square, and the insulation is built in. It costs more than raw timber, and it is another thing to order, so it has to arrive before the roofer needs it. Where it is part of the specification, it is named in the quote alongside the rooflight.
| Timber kerb | Factory kerb | |
|---|---|---|
| Who makes it | The carpenter, on site | The maker, to the unit size |
| Adjusts to site | Easily, to suit the roof build-up | Within the range the maker offers |
| Accuracy | Depends on the carpenter and the check | Square and flat as supplied |
| Insulation | Added by the builder | Normally built in |
| Ordering | Timber is on site already | Ordered with the rooflight, to arrive before the roofer |
Whichever you choose, the check is the same. Before the roofer starts, someone measures the opening corner to corner and across both diagonals, then lays a level across the top. A kerb that is a few millimetres out of square is easy to correct on the deck and awkward to correct once the membrane is stuck to it. Our page for builders sets out what we send and when.
Building in the fall
A flat roof is not flat. It is built with a slight fall so water runs to the gutter or outlet, with the rooflight in the middle of that slope. This is the detail that most often goes wrong, because the kerb is a rectangle and the roof around it is leaning.
The fall means the roof surface is higher on one side of the opening than the other. If the kerb is cut to a single height all the way round, the upstand on the uphill side stands lower above the water than the upstand on the downhill side. The maker's minimum height has to be met on the lowest side, which means the kerb is cut with the fall in mind or built taller than it first looks. The fall can also be created by tapered insulation boards, in which case the thickness changes from one side of the opening to the other.
There is a second effect on the uphill side. Water running down the roof meets the kerb face and has to go round it. Where a rooflight is wide across the fall, a pocket can form behind the kerb on the uphill side. A well-built roof puts a small cricket there, a ridge of fall that divides the water and sends it around either end of the kerb. Your roofer will know whether the opening needs one.
The kerb itself must be level, even though the roof around it is not. A rooflight is made to sit on a level frame, and a kerb that follows the slope of the roof forces the unit to twist. So the top edge is cut level and the height changes round the opening. If you want a fuller explanation of why water has to run off the roof at all, see our answer on whether a flat rooflight needs a slope.
Insulating the kerb
The kerb is a short column of timber or plastic standing in the middle of an insulated roof. If it is left bare, it is a thermal bridge: a path for heat to leave the room, and a cold surface where warm moist air from the room can condense. The roof insulation therefore needs to be carried up the inner face of the kerb as well as laid around it.
On a site-built kerb, the usual method is to line the inside face of the timber with rigid insulation board, cut tight, and to seal the joints. On a factory kerb the insulation is built in, but the roof insulation still has to meet the kerb without a gap. The two should touch and be sealed where they meet, because a gap behind the kerb can let warm air reach the cold side of the covering.
The energy rules apply to the rooflight as well. Under Part L of the Building Regulations for existing dwellings, a rooflight is expected to achieve 2.2 W/m²K, and a roof window 1.4 W/m²K or a WER Band B rating. These figures are for the unit, and the kerb and its insulation are what allow the unit's performance to be achieved in the finished roof. A good rooflight on a poorly insulated kerb loses much of what it gains.

Agreeing it with your builder
Most upstand problems begin as a conversation that did not happen. The architect drew a rooflight, the builder priced a roof, and nobody wrote down the kerb height, the clear opening or the build-up. The remedy is a short list, agreed before the deck goes on, with the same numbers on every drawing.
- The exact rooflight. Name the make, the model and the size, because the kerb depends on the unit and not the other way round.
- The opening size. Both the outer kerb dimensions and the clear internal opening, given as the carpenter will build them.
- The upstand height. Measured over the completed covering, with the maker's minimum stated, and what that means on the lowest side of the fall.
- The build-up. The insulation and fall layers between the deck and the covering, so the height can be worked out.
- Who makes the kerb. The carpenter, or the maker as a factory kerb, with the delivery date if it is the latter.
- The roofer's visit. The date the covering is laid, so the rooflight can be fitted soon after rather than leaving the opening exposed.
After a survey, our written quote names the unit and glazing, the expected lead time as stated by the maker, and the points we need the builder to confirm. The builder gets the kerb and opening dimensions for that unit on paper before the deck is laid, so the carpenter works from the same numbers as the order. We time the order to the programme, counted backwards from the day the covering is due, and both you and your builder get the confirmed delivery date.
Then the trades follow in a fixed order. The roofer lays the covering up the kerb, we fit the rooflight to the finished upstand, the electrician makes any connection for an electric opening unit, and the plasterer finishes the reveal. If you are fitting into a roof that is already finished, our answer on adding a flat rooflight after the roof is done explains what changes. For the full range of units and kerbs, the flat roof rooflights page is the place to start.
Questions about kerbs and upstands
- Can the kerb be taller than the maker's minimum?
- Yes. The minimum is a floor, not a target. A taller kerb lifts the glass and deepens the reveal, so check how it looks against any parapet and what it does to the room below before choosing one.
- Who checks the kerb before the roofer covers it?
- The builder or carpenter should, with us if the kerb is for a unit we are supplying. The checks are square, level across the top and the right height over the completed covering. It is far easier to put right before the membrane is on.