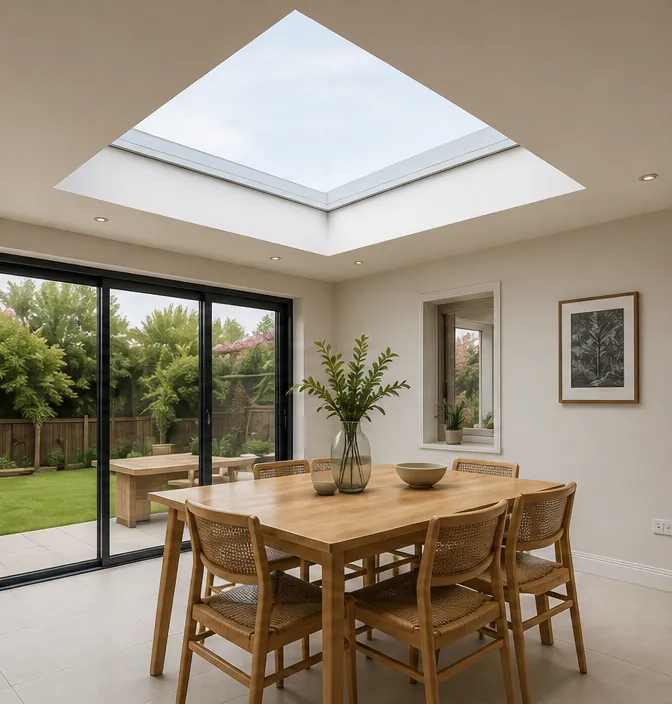
A kitchen extension has its joists in, its walls up and its roof deck on. The rooflight is on order and it opens by motor, which nobody has told the electrician. Two weeks later the ceiling is boarded, the plasterer has been and the first question from the fitting team is where the cable is. There is no cable. It is not a disaster, but it means cutting into new plaster and running a route that should have gone in with the first fix, and it is the most avoidable delay on an electric rooflight job.
The cure is a sheet of paper. Before the walls are boarded, the electrician needs to know what supply the rooflight takes, where its actuator sits, where the switch goes, and whether there are extras such as a rain sensor. We send that information with the written sizes for the kerb, so the person with the cable in their hand knows the answers while the structure is still open. This guide sets out what is on that sheet and why each item is there.
Mains or low voltage
Electric opening rooflights are driven by an actuator, a motor with an arm or chain that pushes the glazing open and pulls it shut. The first thing the electrician needs to know is what that motor runs on, because it determines the cable, the protection and who is allowed to connect what.
Some actuators run straight from the mains. Others run on low voltage, commonly direct current, fed from a transformer or power supply that steps the mains down. The data sheet supplied with your particular unit says which, and we quote from that. A unit with a separate power supply has two circuits to think about: the mains side that feeds the supply, and the low-voltage side that runs from the supply to the actuator.
| Question | Mains actuator | Low-voltage actuator |
|---|---|---|
| What feeds it | A mains cable from a protected circuit | A power supply, itself fed from the mains |
| Cable to the rooflight | Mains-rated cable | Low-voltage cable, sized for the run |
| Where the supply sits | Not needed | Near the rooflight or in a cupboard, reachable for service |
| Who specifies | The electrician, to the data sheet | The electrician, to the data sheet |
Neither type is better in itself. Low voltage is common because it keeps the mains away from the roof structure and allows a slim cable. What matters is that the electrician knows which they are wiring before they start. Electrical work in a dwelling falls under Part P of the Building Regulations, and the qualified electrician who installs the circuit is the right person to decide how it is protected and certified. The does it need an electrician answer covers that question directly.
Where the cable runs
The cable has to reach the actuator, which is built into the rooflight frame or fixed to the kerb, and the route is usually from a point in the ceiling void or the roof structure near the opening. The cable goes from the supply or the switch, through the structure, to a termination point near the kerb where the fitters will connect the actuator on the day.
A route that works on a flat roof extension runs along or across the joists, within the zone where it will be hidden by the ceiling. Drilling through joists should follow the usual rules about where holes can be made, which the carpenter or structural engineer will know. On a pitched roof the cable may be clipped to rafters in the loft space, running down the side of the opening to the reveal.
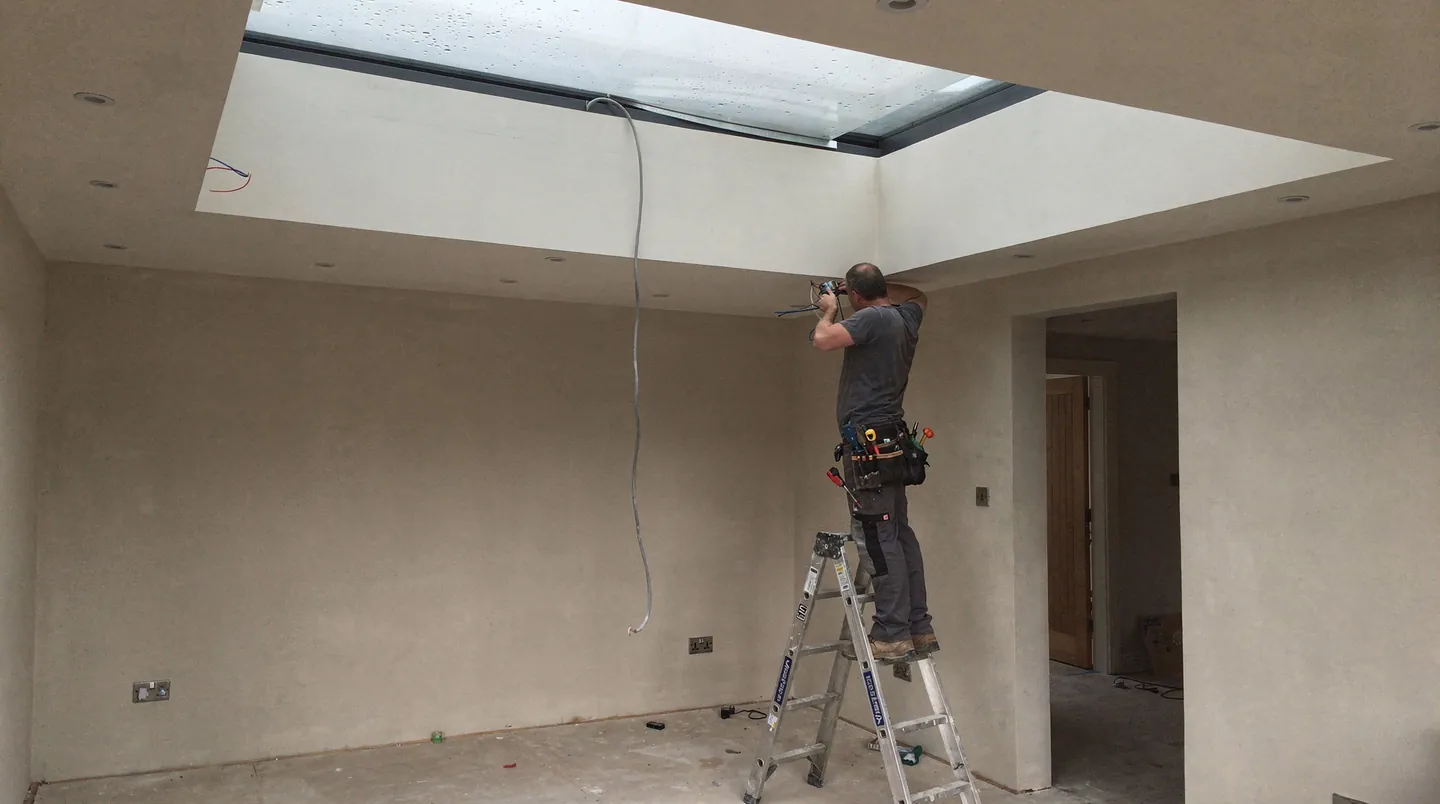
Leave enough cable at the opening. The fitters need a loose length coiled and clipped safely near the kerb, so the actuator can be connected without stretching it. A cable that stops short at the edge of the joist void causes delays, because a joint then has to be made in a junction box that must stay accessible. We give the electrician a note of how much length to leave for that particular unit.
- Keep the cable clear of the kerb, the insulation line and the position of the glazing.
- Leave a protected coil at the opening, not a cable pulled tight.
- Mark the cable end at the ceiling so it is not plastered over.
- Record the route on a sketch for the electrician's own file.
First fix before the ceiling closes
First fix is the stage where cables and back boxes go in, before the walls and ceilings are closed. It is the one chance to run an electric rooflight's cable cleanly. Once the plasterboard is up and skimmed, adding a cable means chasing walls, making good the finish and redecorating, and in a new extension that is a poor start to the room.
The best moment is when the roof deck is on and the insulation is going in. At this point the position of the rooflight is fixed by the kerb, the route is easy to see, and the electrician is usually on site for other circuits anyway. We contact the builder at the time we send the kerb sizes, and ask that the electrician is told. If the build programme has the electrician's first fix booked, we give a date by which the rooflight information is needed.
Reveal lighting and other circuits
The same first fix can carry other circuits that belong to the rooflight. Lights set into the reveal, a light fitting under a roof lantern, a blind motor and a rain sensor each need a cable. If any of them is wanted, they are best listed at the same time so the electrician runs everything in one go. Reveal lighting in particular must go in before the plasterer, as it sits within the reveal.
If the ceiling is already closed, it is still possible to wire the rooflight, though it costs more and takes longer. The usual alternative is a surface route in trunking, which is neat enough in some rooms and unwelcome in others, or a battery or solar option where the unit allows. Talk to us early if that is where you are. The cost of an electric rooflight explains what the electric parts add.
Controls and switches
An electric rooflight needs a way to be told to open and close. The simplest control is a wall switch, a rocker or a push button, which sends power to the actuator in one direction or the other. A switch needs a cable from the supply to the wall and a cable from the wall to the rooflight, so its position should be settled at first fix.
Other controls work by remote. A handheld or wall-mounted transmitter sends a signal to a receiver connected to the actuator, so the switch can be moved later and the room needs no extra cable. Some makers add a link to a smart home system so the rooflight can open on a schedule, or by phone. These are conveniences, and the cable for the receiver still has to reach the unit.
Where to put the switch
Think about who will use it. A switch beside the garden doors suits a kitchen, since the person opening the doors will also want the air moving. A switch by the bed suits a bedroom. A switch that is out of reach of children is safer in a family room. Place it where you can see the rooflight from the switch, because it moves slowly and the person operating it should be able to watch it open.
Rain sensors close an opening rooflight when they detect rain. They are a useful extra where the room is empty during the day, and the rain sensors guide covers how they work. A sensor needs its own connection, and it may need a dedicated cable to the outside, so it belongs on the first fix list. The wider question of whether to choose a motor or a hand-operated unit is in manual or electric.
Power failure is worth thinking about at this stage. An electric rooflight that cannot move in a power cut may need a manual override or a battery backup, depending on the unit. The power cut answer explains what happens and what can be specified.
Connecting on fitting day
On the day, the fitters set the rooflight on the kerb and the roofer's membrane is dressed up to the frame. The actuator is part of the unit, and the cable the electrician left coiled at the opening is brought to the connection point. Our fitters make the connection on a low-voltage supply where the unit is designed for it, to the maker's instructions. Where the unit takes mains, the electrician makes the final connection, so they need to be on site or on call that day.
This is one of the points on the build programme that has to be agreed in advance. The order is: the roofer completes the membrane, the fitters set the unit and fix the actuator, and the electrician connects the cable. The electrician does not need to be there for the whole day, only for the connection, and a half-hour slot agreed in advance avoids a wait. We confirm the fitting date with the builder in writing, so the electrician can book accordingly.
- Roofer: Membrane finished and dressed up the kerb.
- Fitters: Rooflight set, fixed and sealed to the kerb.
- Electrician: Cable connected to the actuator or power supply.
- Fitters: Travel and closing checked, trims fitted.
Testing and handover
Once the cable is connected, the rooflight is tested before anyone leaves. The fitters run it through a full cycle, open and closed, and watch the seal at the closed position to check that it pulls down evenly. They also test the controls, including any remote, sensor or backup, and confirm that the travel stops where it should.
The electrician tests the circuit separately. They check the protection, the connections and the continuity, and they provide the certificate or notification that Part P requires. That paperwork is theirs to supply, and it belongs with the house records. We ask for a copy if one is available, to file with the rooflight's own paperwork.
- A full open and close cycle, with the seal checked at the closed position.
- Each control tested: switch, remote and any rain sensor.
- The electrician's certificate or notification passed to the homeowner.
- The maker's instructions and control details left with you.
- The 10-year workmanship guarantee confirmed in writing.
We then show you the controls and how the unit behaves, including what it does in a power cut and how to operate any override. It takes a few minutes, and it saves a call later. The fitting meets current Building Regulations, and for an electric unit that includes the electrical side, which the electrician's certificate covers.
Reveals are finished by the plasterer after the fitting, as for any rooflight, and the decorator follows. If the rooflight gives access to a flat roof, see access to a flat roof for what that adds. The electric opening rooflights hub has the full range and the wider picture.
Wiring questions from electricians
- What does the electrician need from you before first fix?
- The unit's data sheet, the position of the actuator, the switch position, any extra circuits such as a rain sensor or reveal lighting, and the week the roof deck will be on. We send these with the written sizes.
- Can the cable be added after the ceiling is plastered?
- It can, but it is harder. A surface route in trunking or a battery or solar option may suit, depending on the unit. We discuss the options at survey, before the quote is final.
- Who supplies the transformer or power supply?
- Where the unit uses one, it is supplied with the rooflight and listed in the quote. The electrician decides where it is mounted so that it stays reachable.